
Materials Needed:
* cotton fabric about 1 yard
*fat quarter of flannel fabric or light weight stabilizer
*1/2 yard of terrycloth, fleece or medium weight stabilizer
*70″ of bias tape or make some if you have enough fabric.

 For now you will be working with just the following pieces: the bias tape, the 3 pieces of flannel, 2C pieces & 1 D piece.

 Cut off a 9 1/2″ piece of bias tape.
 Unfold the bias tape. Place the top edge of the bias tape onto the folded edge of the fabric.
 Sew bias tape on. If you are using homemade bias tape, do not sew in the ditch, sew in a little bit. If you are using store bought bias tape line up the shorter side on the top edge and sew in the ditch.
  Now fold bias tape up.
 And over, then fold edge raw edge under.
  Sew bias tape as close to the edge as possible.
 Here is what your first finished piece will look like.
  Repeat with the other C piece and 9 1/2″ x 5 1/4″ piece of flannel. Once that is finished, repeat the same steps but with the D piece and the 7 1/2″ x 5 1/4″ piece of flannel. Your three finished pieces should look like this now. These are going to be the pocket pieces on your organizer.
  Take the D pocket piece that you just made and measure how wide you want your slots to be. You can make them as wide as you want, depending on what you will be using them for. I made my slots 1″ apart with one larger slot. Make sure when you are making your marks that you figure in for the 1/2″ sew seam on both sides of the pocket.
  Take a marker and draw your lines down vertically. Gather a B piece of fabric and place the pocket piece on top of the B piece of fabric. Pin in place and sew down the vertical lines to make your slots.
  OK, this is where the lettering of each piece of fabric comes in handy. Gather three pieces of A, one piece of B and the B pocket piece, along with all of the terry cloth or medium weight stabilizer. Lay out all of your pieces like so with the terrycloth or medium weight stabilizer underneath each of the pieces of fabric shown. Pin the 2 pocket pieces C (C pocket pieces are the ones that you just made above with the bias tape) in place on top of the two side A pieces like below. Make sure the bottom of the C pocket pieces are even with the bottoms of the A side pieces.
 Now, working with the A pocket piece and the A bottom piece pin right sides together.


 See? Make sure you back stitch at the beginning and the end a few times as well.
 Now attach the other A pocket piece to the other side of the A bottom piece.
 Your pieces should look like this now. All the A pieces are connected and the B pieces on the sides.
 If you need to straighten up the edges a little bit. You want to make sure everything is kept straight.
 Pin the B piece onto the A bottom piece and sew in place.
 And repeat with the other B pocket piece that has the slots.
 All 4 sides should be sewn in place now. (Sorry guess I forgot to take a picture of all the sides attached.)
 Sew edge. Make sure you start and end at the edge, do not start the 1/2″ in here. Also make sure you back stitch a few times near the bottom piece. You want it to be strong, since that is going to be the bottom of your organizer.
 Repeat with remaining sides by pinning and sewing in place. It does not matter which order you sew them together in.


 Now you have the outside of your organizer all finished. Turn right side out.
 Now it is time to make the lining of the organizer. You are going to repeat the same steps that you just did in making the outside of the organizer, but this time you are only working with the cotton pieces of fabric and no stabilizer or batting.
 Like before, sew the bottom piece A to a side piece A.
 Remember to start and stop sewing 1/2″ from the edges.
Now sew together the last A piece to the other side of the A bottom piece.
 Now sew the B side pieces on.
 All four sides should be sewn onto the the middle (bottom) piece now.
  Begin by lining up the sides and sewing in place, like you just did with the outside of the organizer. Remember you don’t need to sew them together in any particular order.

 Gather the rest of your bias tape. Now you are going to sew the inside and the outside of the organizer together around the top by using the bias tape.
  Start by folding one edge of the bias tape in and ironing it flat. You will be working with the folded edge of the bias tape first. Pin the bias tape in place all around the top edge of organizer.
 Sew bias tape in place starting at the folded edge and ending at the folded edge. Allow the unfinished edge of the bias tape to overlapp the begining folded edge of the bias tape a little.

See how I covered up the folded edge of the bias tape a little bit?
 Fold bias tape up, over and under.
 Pin bias tape in place
 And sew. Like before, sew as close to the edge as possible.
 Now gather the 2 pieces of fabric that are 17″ x 3″. It is time to make the handles.
 Fold right sides together and stitch all around leaving a 2″ space in the middle for turning right side out.
 Turn right side out and iron flat. Top stitch all around handle.
 Sew handles in place where desired.
Attach the handles on by sewing a box to make them stronger. You can see I sewed a little spot at the top of the organizer on the bias tape to keep the handles in place better.
 If you want, take and sew the handle together into itself to make them smaller. Measure up about 2″ away from edge of bag, fold edges together and stitch.
  And that is it! Your finished!


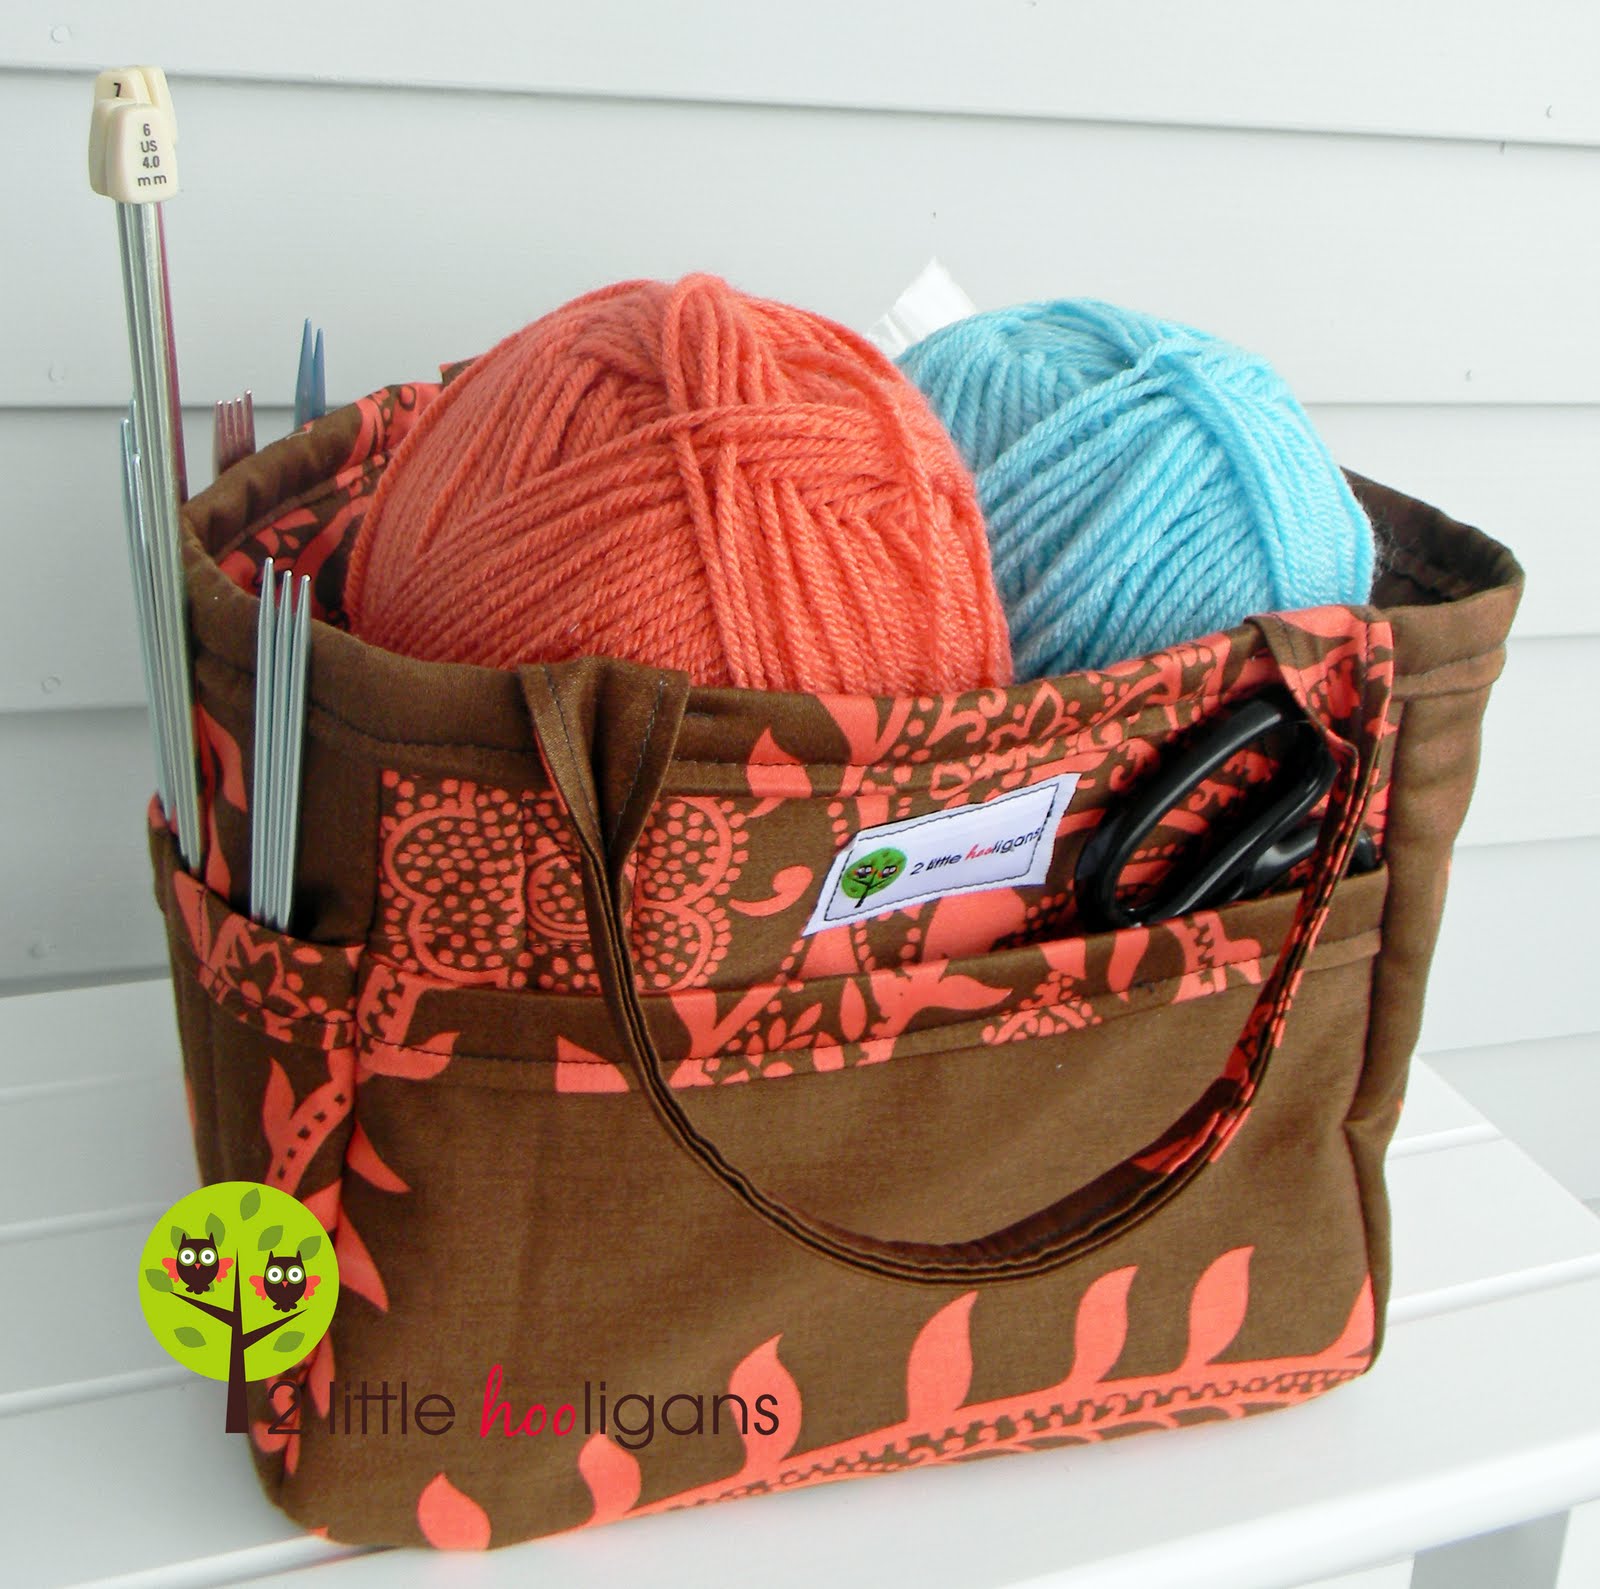
I love this little organizer! Not sure what I will be storing in it yet or if I will even keep it for myself. I just couldn’t help but throw my yarn and knitting goodies in there. The colors just looked too good not too!


OMG…. I <3 this. Now I need to find material I want to use. Lots of it. Because I'm going to screw this up at least once. (Oh ye of little faith, lol.) This is so fabulous. So, seriously fabulous. Thank you SO much for doing this for us Christina, and I hope that you are feeling better!!
Just a quick note to let you know that a link to this post will be placed on CraftCrave today [29 Mar 01:00am GMT]. Thanks, Maria
Thanks for your hard work, it is a wonderful tutorial, can't wait to get one of these started!
Oh my goodness! This is a wonderful tote, and lucky for me your tutorial is so well explained. I'm going to give this ago, very adventurous for me but it's nice not to give it ago, thank you for sharing.
came out so fabulous!!! love it!!! Such a wonderful tote!!!
Thank you so much for the tutorial! I need to make this bag for all my yarn and crochet items! Thanks!
Jill of oursevendwarfs.com
Thank you! You have given us all a wonderful gift with this tutorial. You did an amazing job and I plan to link to it at Thymely Stitches.
Thanks! Great Tutorial
YHANK YOU for this great tutorial!!! Gonna save this and make one soon… First have to find the right fabric!!!!
Great Bag and Tutorial! Will have to make this one soon!
XoXoXo
Joy
I found this from craftgossip.com and I LOVE it! I can't wait to make one! Thanks!
this is a great tutorial, i can't wait to try it!!
I really do love this!!! I need to try to make one — But I'm sure mine won't be as pretty as yours! 🙂
Amanda
Awesome! I linked and shared this fabulous idea and am now a follower of your blog!
http://themanyfacesofsarahhankins.blogspot.com/2011/04/another-gem-of-idea.html
This is such a great project–and love the tutorial!
I'd love to invite you to link up in the Idea List I run on Tuesdays on my blog: http://www.Stashhappy.com
Hi I am your new follower/s from Tip Me Tuesday Link. I absolutely love this bag and the tutorial! I too love sewing, but never made something like that! Hope you can follow me too, Karima.
http://www.karimascrafts.com
and
http://www.karimasblogs.blogspot.com
I've been looking for a tutorial on a cute tote but many of them are plain. I LOVE this one! Thanks for sharing!
This is so fabulous, I love it! THANK YOU for the great tutorial!
Thanks for sharing your tutorial…I have linked to youon my freebies blog…hugs Khris
Awesome bag!! Thanks for the tutorial!
This tutorial is amazing, it's so detailed! I've totally stolen it and (someday) I will definitely be making a bag using your tute. 😉 Thanks!
Thanks for this beautiful tutorial, it's real beautiful bag 🙂
You have a wonderful pincushion with hook, did you do it ? Is it a model we can buy somewhere ?
Thansk for your answer.
Hi Nathalie, I did not make the pin cushion I purchased it from namolio on etsy.
http://www.etsy.com/shop/namolio
I love my little pin cushion and it is beautifully made! thanks for asking.
This is fabulous! What are the finished measurements of this bag? How wide/tall is it? I want to make it, but first need to know if the final product will be big enough. If not, would it be hard to make it bigger? (Is it obvious that I am a beginnger? LOL)
Hi anonymous, the finished measurements are about 7 1/2" tall and the tote is 7 1/2" wide x 9 1/2" long. You can certainly make it bigger or smaller. Just make sure that you keep the bottom of the bag and two of the sides the same measurements. also make sure that all of the sides are the same height. Does that make sense? Just let me know if you have any other questions, I will be more glad to help you out.
This is quite possibly the most detailed well explained sewing how-to I've ever seen! You make me (as a sewing novice) feel like I could really accomplish making a bag like this!
Thank you for the great bag tutorial. I added your tutorial to our collection at the online sewing community at mysewingcircle.com (linking back to your site). You do great work!
The tote is beautiful and thanks for such a great tutorial….. you are very generous!
Awesomesauce. When I make it, I'll link back for sure. Again, awesomesauce.
Oh WOW! What a great basket and an amazing tutorial. You explain things so well and so clearly! I can't wait to make this… I know just the fabric for my new knitting tote. =) I'll be linking as well.
ok, I. LOVE. THIS. My friend just sent me your link and said I need to make this for HER birthday, I think I will be making them for everytone's birthday! Thanks so much for the easy to follow tutorial!
oh, i love this! and it would be perfect to make for gifts for my mom and mother-in-law for mother's day! now i'll just have to see if i can carve out that much sewing time before then!
I can't wait to make several of these for Christmas gifts – beautiful! Deanna Skinfizzical.com
i so will be making this for my mom, her birthday and mothers day r the same, hope i finish it in time xD
love your blog <3,
erika
la-bu-bu.blogspot.com
Hey there 2 little hooligans! We think your crafty project is awesome, and we want to share it with other sewers and quilters by featuring a link on http://www.WeAllSew.com! We’ll be featuring your project at our "Free Stuff" page all next week. Please let me know if you have any questions about being featured at WeAllSew.com. Thanks so much-Erika
Just finished this awesome project! Thanks so much for the tutorial. I ended up using a different color bias tape and different fabric for the lining..turned out pretty cute! I posted it here:
http://www.thecraftproject9.blogspot.com
That's so clever and a really clear tutorial – another project to do this holiday!
Ohh, I can't wait to try several of your projects! Thanks for sharing this one and the casserole carrier–they are going to make great gifts!
Thanks so much for sharing your talent!
Linda e maravilhosa!
Parabéns!
Beijos brasileiros
wonderful bag – but a beautiful pin cushin!!
So cute! I want to make this while I'm on holiday, but I'm wondering – what size is the bias tape? I looked all through the tutorial and I hope I didn't just miss it. Thanks for your help!! – Megs
megs, you will need about 70" of bias tape. you can make you own or i like to use the extra wide double fold bias tape that comes in a package of 3 yards. hope this helps clarify things for you.
Thanks – that helps some. Although, I was thinking more of the width – I've seen bias tape makers in 3/4", 1", 1.5", and 2" wide. It sounds like I'd need the widest one? Thanks for the prompt response! ~Megs
yes, i would go with a wider one. the layers are thick so if you used a bias tape that was too thin it would be harder to line up straight on the edges while sewing.
Thank you! ~Megs
Thank you for this! I think it's awesome and I think I'll make one as a baby doll diaper bag! How cute to put your baby doll diapers/wipes, and some store bought bottles in the different pockets, along with a sewn baby doll blanket. I just found your site and I'm so impressed with your creativity and sewing abilities. Thank you for sharing!! Julie
It’s a pleasure to find such raonliatity in an answer. Welcome to the debate.
how wide did you cut the fabric strips that you made into your own bias tape? I bought contrasting fabric for the edges, handles and lining 🙂
i think i cut my bias strips about 4 or 5" wide. i like using a wider bias tape for the bags, but any size will be fine:)
Thanx for shareing yur tutorial. I have now made my own basket, and I love it. you have made a very easy step-by-step tutorial, and the basket is just lovely!!!!Thanx.
thanks for the tute, wondering how to make them
i love the pincushion too .. soo silvery vintage ^^
Great tutorial! You've been featured on the Quality Sewing Tutorials blog.
We hand select only the best free tutorials and patterns for home sewers.
Grab a brag button!
Great tutorial, easy to follow and with a lot of picture,
This is mine http://my-wayof.blogspot.com/2012/02/accesorios-costura.html
Thanks
Thank you so much for this tutorial! It was fantastic, very easy to follow.
Hi, thanks for the tutorial. I worked on it for 2 days. I am a newbie in sewing. I decided to use my Kaufman Linen and Michael Miller fabrics. My daughter said it looked lovely. Thanks again for your clear instructions.
I am extremely impressed with your writing skills and also with the layout on your blog. Is this a paid theme or did you modify it yourself? Anyway keep up the nice quality writing, it’s rare to see a nice blog like this one today..
bwEuiB Thanks again for the blog.Really looking forward to read more. Really Cool.
Some genuinely great content on this website , thankyou for contribution.
I am so very excited to try this tutorial this weekend! My friend will love her new purse!
Thank you for taking the time to write up this wonderful tutorial.
Just perfect.
Thank you so much for posting this wonderful tutorial! It was so easy to follow and such a cute idea 🙂 I turned it into an Art Tote for a 6 years old’s birthday present!
Just finished this tote. I changed the dimensions a little to make it a little bigger. Directions were absolutely easy to read and follow. Tote turned out so cute I am cutting 4 more out for Christmas gifts for my Nurse friends. Thanks so much for sharing.
This is a very beautiful tote basket and th tutorial is very clear, thank you for posting it, very very nice 🙂
Hi, this really looks fun, I will try it soon, thank you for sharing your beautiful ideas.. More fabric flower ideas you can check my blog amalzahrah.blogspot.com
This looks so cool. I love it, and can’t wait to try it.
Cool! I share it on my fb page *O*
Wonderful tutorial. It is such a cute bag. Thanks for sharing. I love visiting your blog, keep up the great work.
That’s a genuinely imivpssere answer.
This has been saved to my favorites! Can’t wait to try it 🙂 Thank you so very much for sharing!
Quality articles or reviews is the secret to interest the
viewers to pay a visit the website, that’s what this website is providing.
After looking into a number of the blog posts on your site, I truly like your way of writing a blog.
I book-marked it to my bookmark website list and will be checking back soon.
Take a look at my website as well and let me know your
opinion.
Good information. Lucky me I found your site by accident (stumbleupon).
I’ve saved as a favorite for later!
It’s going to be end of mine day, but before end I am reading this wonderful paragraph to increase my experience.
Thanks for any other great article. The place else may just anybody
get that type of information in such a perfect means of writing?
I have a presentation subsequent week, and I’m on the search for such information.
Attractive part of content. I simply stumbled upon your weblog and in accession capital to claim that
I acquire actually loved account your blog posts.
Any way I’ll be subscribing for your augment or even I achievement you get right of entry to constantly rapidly.
Pretty portion of content. I just stumbled upon your weblog and
in accession capital to claim that I acquire actually loved account your blog posts.
Any way I’ll be subscribing for your augment and even I fulfillment you access constantly fast.
Howdy just wanted to give you a quick heads up. The text in
your article seem to be running off the screen in Opera.
I’m not sure if this is a format issue or something to do with web browser compatibility but I thought I’d post to let
you know. The layout look great though! Hope you get the problem fixed soon.
Kudos
Hmm it looks like your website ate my first comment (it was super
long) so I guess I’ll just sum it up what I wrote and say, I’m thoroughly
enjoying your blog. I as well am an aspiring blog writer but I’m still new to the whole thing. Do you have any tips for inexperienced blog writers? I’d genuinely
appreciate it.
This is very interesting, You are a very skilled blogger.
I have joined your rss feed and look forward to seeking more of your great post.
Also, I’ve shared your website in my social networks!
It’s remarkable for me to have a web site, which is good in support of my know-how. thanks admin
When I initially commented I appear to have clicked the -Notify
me when new comments are added- checkbox and from now on each time
a comment is added I recieve four emails with
the exact same comment. Is there an easy method you are able to remove me
from that service? Thanks a lot!
Paragraph writing is also a fun, if you know afterward you can write if
not it is complex to write.
I like what you guys are usually up too. Such clever work and coverage!
Keep up the very good works guys I’ve added you guys to our blogroll.
Hi there, You’ve done a great job. I will certainly digg it and personally recommend to my friends. I’m sure
they will be benefited from this site.
You made some good points there. I checked on the net
to find out more about the issue and found most individuals will go along with your views
on this website.
Helpful info. Fortunate me I found your website by accident, and I am stunned why this accident did not took
place in advance! I bookmarked it.
Asking questions are in fact pleasant thing if you are not understanding anything fully,
except this post provides pleasant understanding yet.
If you are going for most excellent contents like me, just pay a quick visit this
website every day as it presents feature contents,
thanks
Genuinely when someone doesn’t understand after that its up to other users that they will help, so here it takes place.
After I initially commented I appear to have clicked the -Notify me when new comments are added- checkbox and now
every time a comment is added I get 4 emails with the same comment.
Perhaps there is a means you are able to remove me from that
service? Thank you!
Excellent way of telling, and good article to get information on the topic of my presentation subject,
which i am going to deliver in university.
Thanks for some other excellent post. The place else could anybody get that kind of info in such an ideal approach of
writing? I have a presentation subsequent week, and I am on the search
for such info.
I absolutely love your blog.. Excellent colors & theme.
Did you develop this web site yourself? Please reply back as I’m attempting to create my own personal blog and want to find out where you got this from or exactly what the theme is named. Thank you!
Oh my goodness! Awesome article dude! Thanks, However I am having troubles with your RSS.
I don’t know why I can’t join it. Is there anybody
else getting similar RSS problems? Anyone that knows the answer will
you kindly respond? Thanks!!
I got this website from my buddy who told me on the topic of this
website and now this time I am visiting this website and reading
very informative posts here.
I love your blog.. very nice colors & theme.
Did you create this website yourself or did
you hire someone to do it for you? Plz answer
back as I’m looking to create my own blog and would like to know where u got this from. thanks a lot
Your way of telling the whole thing in this article is actually pleasant,
every one be capable of effortlessly be aware of
it, Thanks a lot.
Do you mind if I quote a couple of your posts as long as I provide credit
and sources back to your webpage? My blog site is in the exact same niche as yours and
my visitors would definitely benefit from a lot of the information you provide here.
Please let me know if this ok with you. Thanks!
I will right away take hold of your rss feed as I can’t in finding your email subscription hyperlink or e-newsletter service. Do you have any? Please let me know in order that I may just subscribe. Thanks.
Great article.
Hi, I’m a writer based out of Espel, Netherlands and I discovered your site via http://www.2littlehooligans.com/2011/03/28/organizing-tote-basket-tutorial/. Do you have any suggestions for aspiring writers? I’m working on beginning my own blog soon but I don’t really know where to begin. Do you think I should begin with a free site like Textpattern or shell out some cash into a pay site? There are so many options out there that I’m completely overloaded.
.. What would you say?
I every time emailed this weblog post page to all my friends, because if like to read it next my friends will too.
Great tutorial! I made it and I love it! A big THANK YOU!!!!
It’s amazing to pay a quick visit this web site and reading the views of all friends regarding this post, while I am also zealous of getting knowledge.
Everyone loves it whenever people come together and share ideas.
Great site, continue the good work!
Heya i am for the first time here. I came across this board and I find It really useful & it helped me
out much. I hope to give something back and help others like you aided me.
I every time emailed this blog post page to all my contacts, since if
like to read it next my links will too.
I seldom leave a response, however i did some searching and wound up here Organizing Tote Basket tutorial
‹ 2 Little Hooligans. And I do have 2 questions for you if
you do not mind. Could it be just me or does it give
the impression like a few of these responses look as if they are left by
brain dead visitors? 😛 And, if you are posting on additional online sites, I would like
to keep up with everything new you have to post. Would you make a list of all of all your shared pages
like your Facebook page, twitter feed, or linkedin profile?
It’s in fact very difficult in this active life to listen news on TV, so I just use world wide web for that reason, and obtain the newest information.
No matter if some one searches for his necessary thing,
so he/she wants to be available that in detail, thus that thing is maintained over here.
The more efficient the product circulation is the great deal sales and thus more profits.
To this end, Nike was generous in marketing investment.
Right here is the perfect website for anybody who really wants to find out about this topic.
You realize a whole lot its almost hard to argue
with you (not that I personally would want to…HaHa).
You definitely put a fresh spin on a topic that’s been discussed for years. Wonderful stuff, just excellent!
This is such a great tutorial! I hope you will share it in our Bag Brag Tuesday linking party! 🙂
http://blog.chriswdesigns.com/linking-parties/
What’s up it’s me, I am also visiting this web site on a regular
basis, this web site is really pleasant and the
users are in fact sharing fastidious thoughts.
Clever lady!!
It’s remarkable in favor of me to have a web page, which is good
in favor of my know-how. thanks admin
Thank you for sharing this tutorial. It was very clear and easy to follow. I just finished my organizer and I love how it turned out. I am a teacher and I wanted to make it to carry all the supplies I need for when I am working with a small group so I don’t have to run around. Now it is filled with sticky notes, pens, scissors etc so I have a portable desk. Thanks again!
That is why it can be crucial to be appreciative of all things in your life like health, money, job,
happiness, and family. Betting 2% in our bankroll is usually recommended, while betting 5% is recognized as being aggressive.
You may go for interracial marriage and even you may not hesitate which
has a widow. Dan like every other seventeen years old he was living like normal high school
graduation student, before he became a gambling addict by his
friends.
Sports photography is no spot for physically weak people
as it requires substantial amount of efforts and risk taking.
Without the idea spreads and lines, bettors would always bet for the favorite to win.
Very good information. Lucky me I stumbled onto your blog by chance (stumbleupon).
You will find book-marked it for later!
Hi! I was able to have sworn I’ve visited your bpog before but after going
through many of the articles I realized it’s a new comer to me.
Regardless, I’m definitely delighted I discovered it
and I’ll be bookmarking it and checking back frequently!
list of foods that never spoil
powernotebooks custom gaming laptops
I really love your site.. Very nice colors & theme.
Did you make this website yourself? Please reply back as I’m wanting to create
my own website and want to know where you got this from or
just what the theme is named. Many thanks!
WOW! I already know that I have 3 different pieces of fabric that I am going to use for this (to make 3 different bags)!! I have been wanting a pattern for one of these for a long time. I have one for my knitting that I bought but to have it made from the materials I want is such a bonus! Thank you, thank you, thank you for sharing!!!
Entire families are actually wiped out while many
have lost their fathers, mothers as well as their dear
siblings. Professional agents and team representatives do an incredible deal
of vetting before buying a player. You will become familiar with all sorts of things,
like how to inspect your car or truck before operation and how you can load your lift so that the machine
stays balanced.
If you are going for finest contents like me, just visit this site all the time since it offers quality contents, thanks
Be ready to change your schedule, if required,
to accommodate interviews. An anecdote in the news
feature story must be written from the third person as the narrator.
Unfortunately, a lot of people may believe the stereotype that
all sales individuals are somehow trying to trade an inferior product
and cheat others away from money.
Great web site, been scouting forever and a day for tips on the perfect rattan furnishings for
our home and in our patio. This site truly helpedgreat blog
some great info here
However, this scene changed when more programmers became aware of virus programming and started building viruses that manipulated and destroyed data
on infected computers. Advertisers all over the place, advertising everything underneath
the sun. To report stolen email addresses at Yahoo, click Yahoo.
The Wii2HDMI converter, offered by Neoya, costs about $40
and lets you connect your Wii to any HDMI AV receiver
or HDTV. If you happen to be connecting the Wii to a LCD TV, you most
likely have some options as to how in order to connect it.
Insignia 50 plasma tv reviews It therefore appears that manufacturers do everything
they could possibly do in order to cause OLED televisions to take
over from the other kinds of HDTVs that folks are utilized
to.
How many times have you seen a hat or possibly a jacket with the emblem or
insignia from the military branch or a specialized unit.
Aside from watching your selected sports and tv shows with your
Television, it is possible to do a lot more than those things.
Great website, really been searching forever and a day for tips
on the perfect rattan furniture for our home and in our garden. This site
seriously helpedgreat blog some great info here
You’re so cool! I don’t believe I’ve read through something
like that before. So nice to find someone with original thoughts on this topic.
Really.. thank you for starting this up. This
website is one thing that’s needed on the web, someone with some originality!
I’m very happy to find this website. I wanted to thank you for your time for
this wonderful read!! I definitely enjoyed every bit of it and I have you saved to fav to look at new information on your blog.
Hi there this tutorial was awesome!!! I have made my own bag now. Just finished it at 1:35am!!!! Haha it took me all evening! I am a beginner sewer, though. I was wondering, is there an easy way to sew round the inside of the top of the bag? The machine just seemed to get in the way when I was trying to sew the bias tape around the top from the inside. Any tips?
And THANK YOU SO MUCH FOR THIS WONDERFUL BAG!!!
Uau….. Hermoso en verdad y muy practico!!!! me encantó!!! Realizaré varios, son geniales para organizar….. Felicitaciones Cristina, tienes unas manos maravillosas….. Saludos!!!!!
This is that the fibres are naturally smooth and round and undergo very little chemical treatment, causing them to
extremely well suited for wearing next to the skin. You do not have to quit the structure and form fit which a
bra offers to utilize that new racy garment. Slipping it on and
sliding our assets into your cups and wiggling and jiggling for comfort.
Pas mal mais je prefere les t-shirt dans fifa 16
Thank you Christina for this lovely tutorial, I am planning to make one very soon….
sandhya