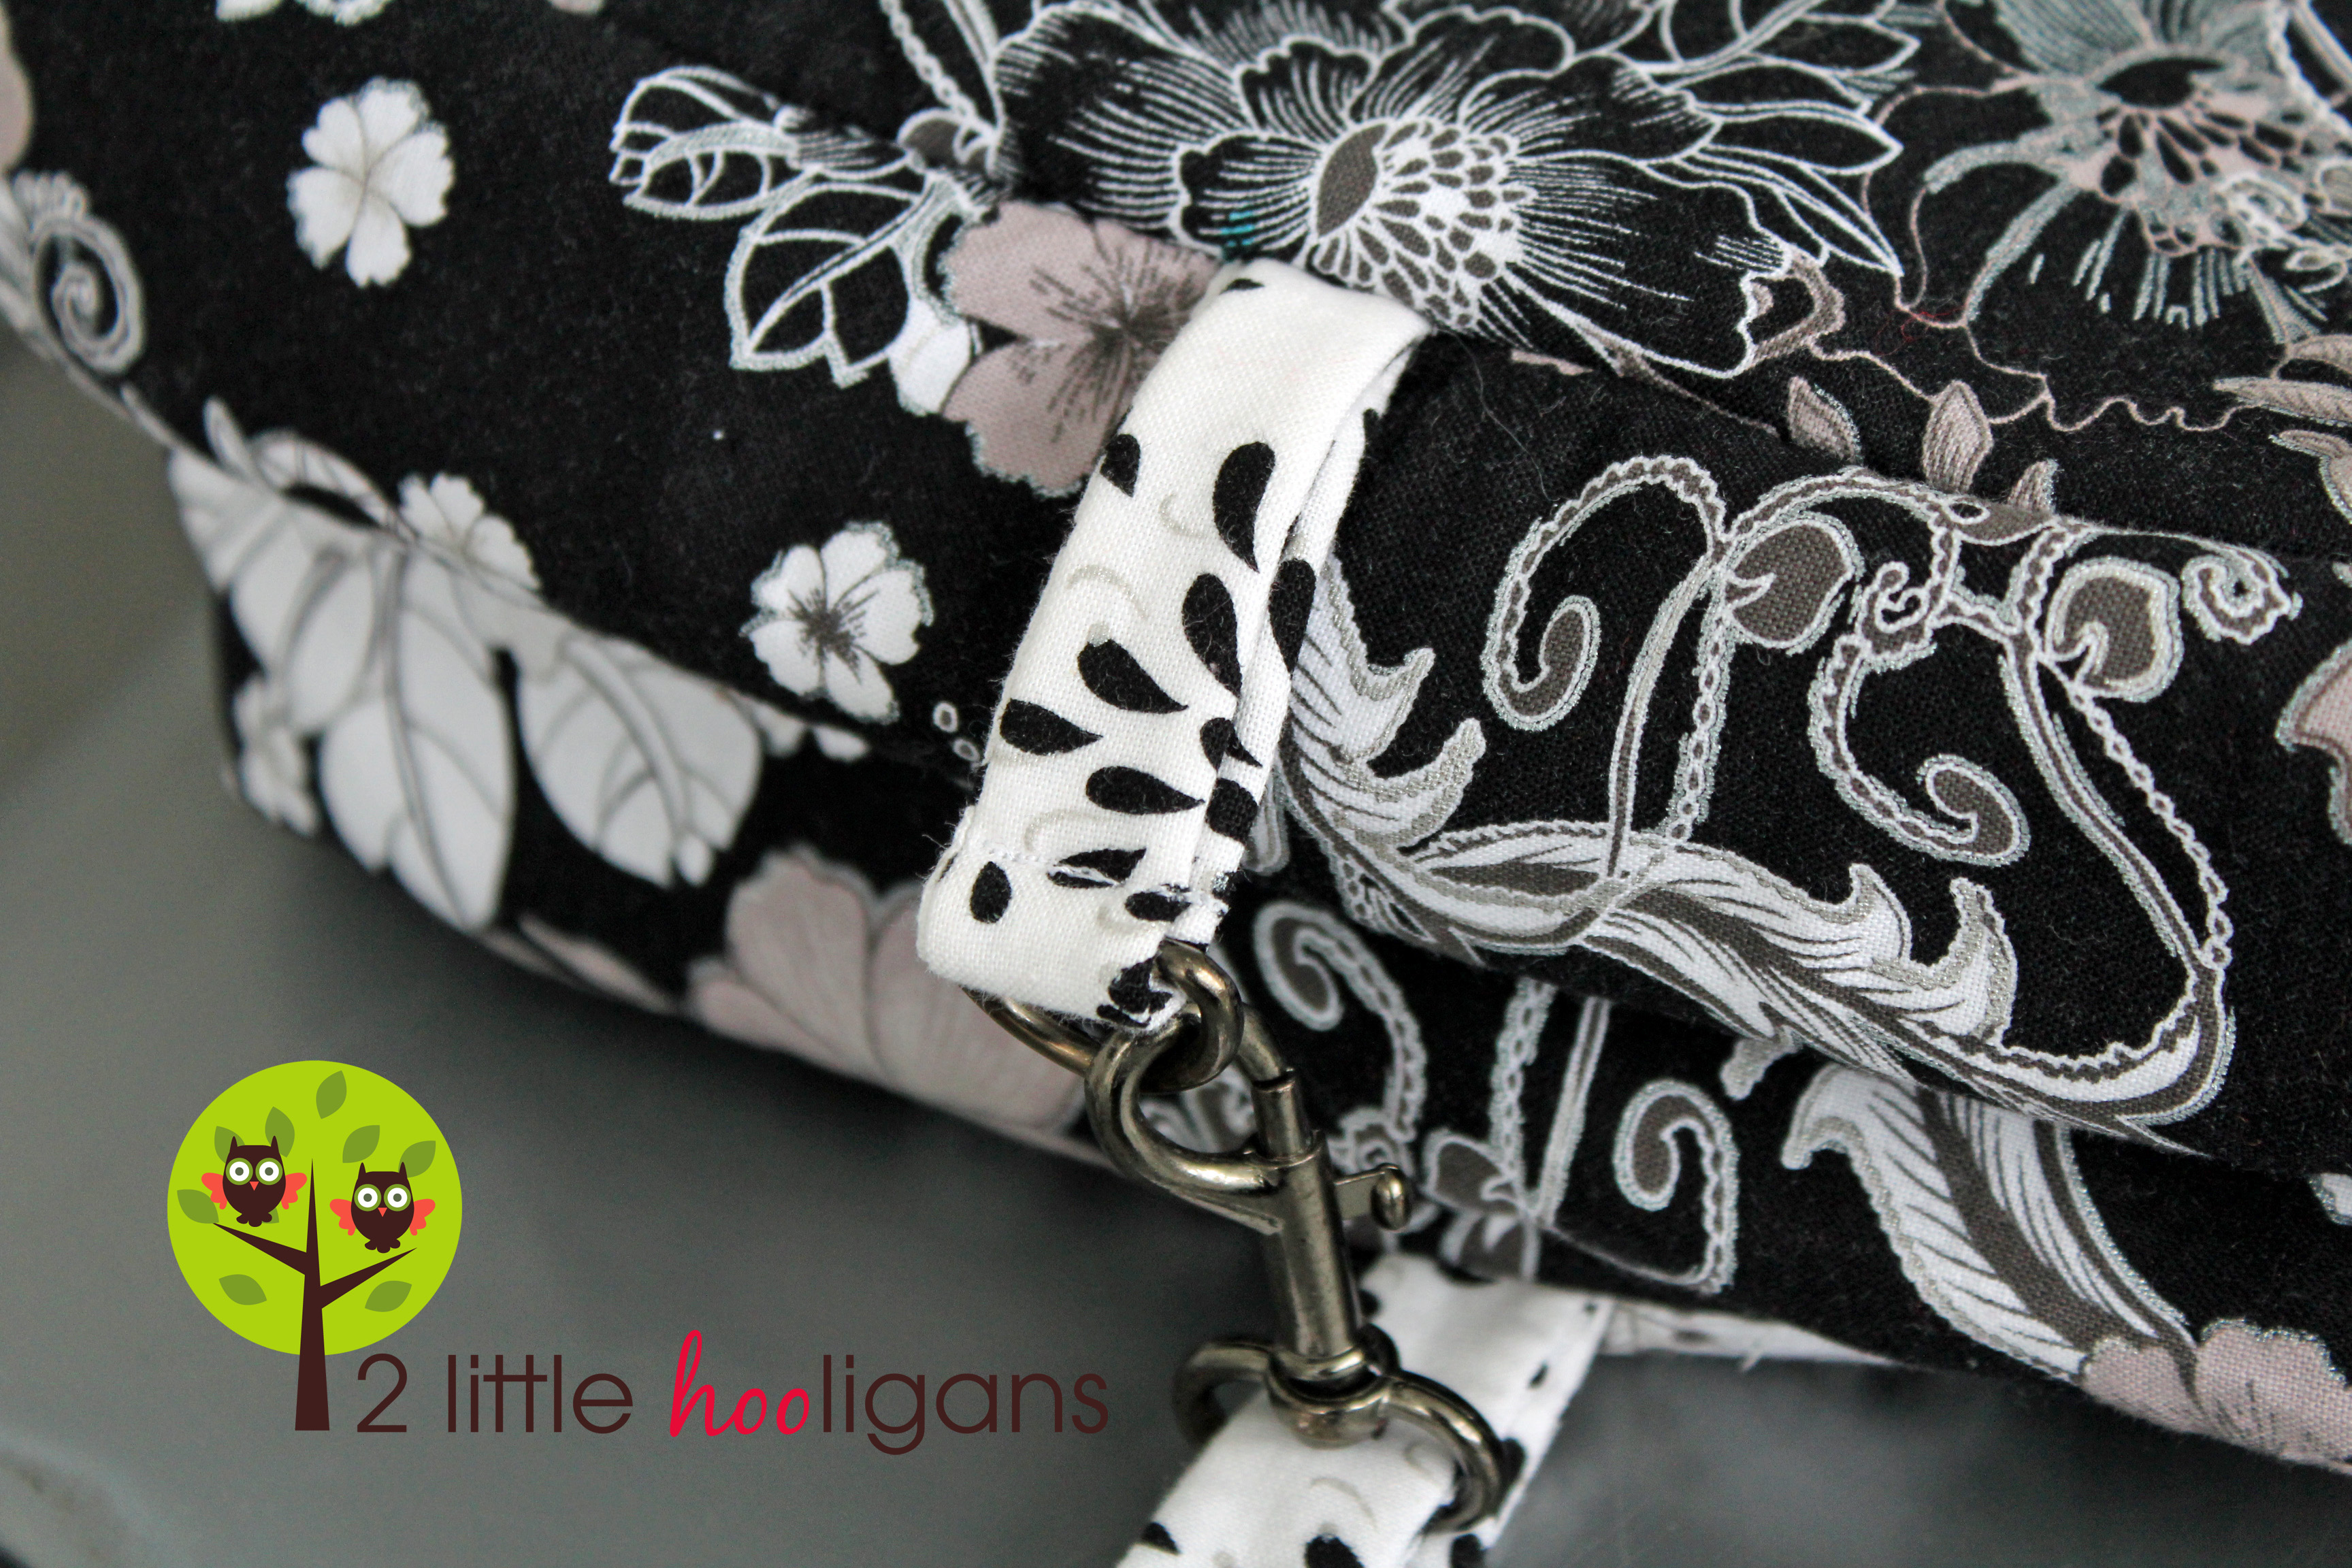
Baby Wash Cloths {Tutorial}

So moving right along with our little baby basket cake…
Today I am going to show you how to make the little baby wash cloths. These wash cloths are by far the most used item in our household that I make. I just love them! For the tub I make them with a minky backing and for the kitchen I use a terry cloth backing. When making these for a baby or myself, I don’t usually add a flannel batting. You know, little wash cloths and little baby parts just go together better. But some people prefer a thicker wash cloth and that is fine, just use flannel as your batting. This is a great beginner project! So those of you that want to start sewing, then this is the one to start with. So grab that machine and some fabric and lets get sewing!
Baby Wash Cloths (8″ x 8″) Tutorial
(allow 15 minutes to complete)

Materials Needed:

*Small scraps of cotton fabric and minky about 9″ x 9″.

*Flannel scraps 9″ x 9″ to use for batting (optional). I prefer to make my wash cloths without the flannel just because my kiddo’s are little and they prefer little lighter weight wash cloths for their hands.

*Card stock to make an 8″ x 8″ template with rounded corners.

Trace around the template onto the wrong side of your cotton fabric.

Pin together the cotton fabric and minky fabric, right sides together. (If you are using flannel as a batting, layer it underneath the minky fabric now.) Sew directly on the marks while leaving a 1 1/2″ opening for turning right side out. Trim off excess fabric except at the opening.

Use your lint roller to remove any fuzzies and spray to remove your marks.

Turn right side out and iron flat. Top stitch around edge of wash cloth.


Pretty easy right?

Just in case you cannot tell by the photo, I made 15 of them. They are great to use in the tub, washing up after meal time or for cleaning those little heiny’s if you are a cloth diaper using momma.

Ruffled Maxi Skirt {Tutorial}

Just in case you missed this a few weeks ago over at Me Sew Crazy.

Ruffled Maxi Skirt Tutorial

(allow about 3 hours to complete)

Materials Needed:


*3-4 yards of white cotton knit (medium weight or light weight).
The skirt above was made with 3 yards of medium weight cotton knit and the skirt below was made with lightweight cotton knit. I personally like the looks and feel of the lightweight fabric better, but they didn’t have any at the fabric store. And just to give you an idea on how much fabric you may need to buy, I am a short size 8 and 3 yards of fabric was just enough and would recommend buying more fabric if you want the ruffles to be more ruffled or if you want more then 4 rows of ruffles.

*1 yard of wide anti-roll elastic for the waist band (of course buy more elastic depending on the size of your waist band needed.)

Use any long A-Line skirt that you already have as your template. Fold the knit fabric so that you are cutting out two pieces at the same time with same sides facing. Sometimes it is hard to tell with knits which side is which and it really doesn’t matter which side you pick as the right side, just make sure that you keep using that same side as your right side. I realized after making my first skirt that since the edges are not finished they roll in a certain direction depending on the direction of the knit. So just try and keep track of the same sides.

Cut all around the skirt giving yourself an extra 1/2″ all around the skirt for a seam allowances.

You now have 2 pieces for the main skirt. With the right sides already facing pin in place and sew both sides.

Turn right side out.

Now let’s determine where to put the ruffles. I decided to have 4 rows of ruffles spaced out evenly every 8″. To figure this out I measure the length of the skirt and divided it by 4, the # of rows that I wanted to have on my skirt. Of course you can make the distance between your ruffles further or closer together. But just so you know, if you want to make more then 4 rows of ruffles you will need more then 3 yards of fabric. Start at the top of the skirt and measure down 8″ and draw a line horizontally around the skirt, front and back. This is will be your guide when sewing the ruffles onto the skirt. Measure down another 8″ and draw your lines horizontally around the skirt again. Now repeat two more times. Set skirt aside.

Now it is time to make the ruffles. Take the remainder of your fabric and fold it so that you can cut long strips of fabric that are 9 1/2″ wide or whatever width you have decided to have the ruffles. I used almost the whole remainder of my fabric in making my strips. Remember to keep track of the right sides and cut the fabric in the same direction. Set fabric aside for now and grab your skirt.

If you want your ruffles closer or further apart that is fine. Just make sure that you cut your ruffles 1 1/2″ wider then the distance you decided to have between each row. This way you will not see the top of your ruffles in each row. I just think it looks much better this way.

Now let’s figure out how long to make each ruffled piece. Start by measuring the bottom line on your skirt. Take that # and multiply by 2, that will give you the total distance around your skirt at that point. Now add 30″ to that #. The extra 30″ is so that you can make your fabric ruffle. Of course you can make your ruffles tighter or looser then I did, just make sure that you add the same amount of fabric to each row. That way your ruffles will all look the same.

For example: The last horizontal line on my skirt measured 24″. Then I doubled that # to give me the total distance around the skirt at that point which gave me 48″. Then I added the extra 30″ to make the ruffle. So I ended up with a piece of fabric 78″ long by 9 1/2″ wide.

Measure out one piece of fabric that is the size you just determined above. My piece was 78″ x 9 1/2″. Sew right sides together.

Turn right side out.

Now make it ruffle by sewing along the top of fabric with a long stitch. Pull one of the threads until it ruffles evenly all around. Now measure the remaining 3 rows and make ruffles for each the same way you just did above.

For example: my next three rows measured 76″ x 9 1/2″, 70″ x 9 1/2″ and 64″ x 9 1/2″. Now line up all of ruffles on their rows to make sure they all line up correctly.

Start with the longest ruffled piece and turn it wrong side out. Place your skirt inside of the ruffled piece and line up your ruffled piece onto the bottom line like so. Make sure that the wrong side of the ruffle is on the outside and right sides of ruffle and skirt are facing. Pin ruffle in place.

Sew ruffle in place using a zig-zag stitch. This will give your ruffle a little extra stretch. Now fold ruffle down. Now take the next longest ruffle and place it onto the next line up. Make sure right sides are facing and wrong sides of the ruffle are facing out. Pin and sew in place.


Repeat with the third ruffled piece.

Your skirt should now have 3 rows of ruffles sew in place. Gather the elastic for the waist band. Measure your waist to see how long to cut the piece of elastic. I like to slightly pull on the elastic when measuring around my waist so that the elastic stretches a little bit when it sits on my hips. I don’t want my waist band floating on top of my hips, but do what works best for you. My elastic was cut 30″ long. Zig-zag stitch the elastic shut.

Now take the last ruffle (right sides out this time) and line it up to the top edge of the skirt.

Now take your elastic band and place it on top of the ruffled piece. So it will be layered like so: A-line skirt (right sides out), ruffle (right side out) and then elastic on top. Pin all three layers in place. Zig-zag stitch all three layers together. If you need to, slightly pull on the elastic so that all three layers line up while being sewed together. Now lay your skirt flat and fold up the bottom ruffle. Trim off the extra fabric from the A-Line skirt underneath.


Now your finished! The perfect skirt for those hot summer days.


Cloth Diaper Wet Bag {Tutorial}

Now that we all know how to make the round nesting baskets for the baby basket cake it is time to start filling them with handmade goodies! One of my most favorite items that I bought for my first child and still use all the time is my diaper wet bag made of PUL fabric. If any of you use cloth diapers one of these bags is a must. These bags are also great for wet or soiled clothing. I keep one in the diaper bag at all times and I also have one in my beach bag. I just wish I would have thought to make one of these sooner. I spent about $45 dollars for two of them about 4 years ago. I would say that they only cost me about $5.00 per bag to make. So worth the $5.00 if you ask me!

What is PUL fabric? PUL fabric is a polyester/ polyurethane laminated knit fabric. It is a waterproof fabric and is used for cloth diapers and mattress covers. PUL fabric can be hard to find but I found a large selection of it here. There are also a few on-line diapering stores that carry PUL fabrics.


Cloth Diaper Wet Bag Tutorial

(allow about 1.5 hours to complete)


Materials Needed:

* 1 fat quarter or a large scrap piece of cotton fabric

*1/2 yard PUL fabric

*two 12 inch zippers

*switch to a small needle and when pinning fabrics in place try not to use too many pins. The more holes pinned into the fabric the more of a chance it will leak a little.

When working with PUL fabric the laminated smooth-shiny side is the waterproof side and will be used on the inside of the bag. The softer side will be on the outside of the bag and will be referred to as the right side of the fabric in this tutorial.

Cut the following:

* 1 piece of fabric 9″ x 13 1/2″ (pocket)

* 2 pieces of PUL fabric 15″ 13 1/2″ (bag)

* 1 piece of fabric 4 1/2″ x 2″ (tag)

Take the 4 1/2″ x 2″ piece of fabric and fold it as if you were making bias tape. Then top stitch down the middle. Gather your piece of fabric and one of the 12″ zippers. Take the piece of fabric and pin the zipper in place on the top of the fabric. The right side of the zipper will be touching the right side of the fabric. Sew in place using a zipper foot. Fold side down flat and top stitch edge. I would not recommend ironing it may ruin the PUL fabric underneath.


Now take one of your pieces of PUL fabric and place it right side up. Now place the piece of fabric on top so that the bottom edges are even and right sides are facing up.

Now make a little mark where the middle of the zipper lines up onto the edge of the PUL fabric underneath. Make marks on both sides.

Now draw a line across connecting your two marks. The line will be used as a guide for sewing your fabric pocket piece onto the PUL fabric.

Now line up the right side of the zipper to the top of the line you just drew. Note** The right side of your fabric will be touching the right side of the PUL on the shorter side of the PUL fabric.

Sew zipper.

Fold fabric pieces down flat. Try the zipper to make sure it works. Now you have the front of your wet bag finished.

Gather the other piece of the PUL fabric and your 12″ zipper. Pin the right side of the zipper to the right side of the PUL fabric. Sew zipper.


Fold PUL down and top stitch.

Now take the piece of PUL that has the zipper sewn on and line it up so that the top of the zipper lines up with the top of the other piece of PUL fabric, right sides facing. Sew zipper in place. Then turn right side out and top stitch the piece of fabric that you just sewed the zipper onto.

Now pin the two pieces together and trim if needed.

Take the tag and pin it on the top side of the bag just below the zipper or place it on the side of the bag. It’s your choice where you want to put it. Sew sides and bottom of bag. Take your time the PUL fabric is a little slippery and will move a little bit.

Now square off the bottom edges to give it shape. Just make sure that you grab the fabric pocket piece with the front of the bag when sewing the corner edges. If not, it will give you a funny looking edge.

Turn right side out and now your finished!


You will love these little bags!


**Please feel free to use this tutorial for your personal sewing projects…not to sell in your etsy shop. You may link this to your blog and use any photo’s. Just please be kind and give credit where credit is due. I put a lot of time into my designs and tutorials.**

Any questions or comments please do not hesitate to contact me. If you make one using this tutorial, please add it to my flickr group. I would love to see it!

Round Nesting Baskets {Tutorial}

So are you all ready to start sewing your Baby Basket Cake?

Let’s start things off by making the round nesting baskets, after all those cute baskets are what make this a cake. Now I made templates (below) for all of you to use. Just click on the highlighted link above each template and it will bring you to Scribd where you can print the templates. For those of you that have never used Scribd before it is really easy to use and just let me know if you run into any problems. I also want you to realize that these baskets may sound small but they hold a lot of goodies, trust me! So if you want to make a smaller cake, just make your baskets smaller. You can do that by shrinking the size of the templates. Just keep in mind that if you do shrink the size of the baskets you will also have to re figure the length of each piece of fabric cut which is easy to do. Just take a tape measure and measure all around the circle and then just add 1″ for the sew seam allowance. And of course you can make your own templates at home by using a protractor and bowl. Just make sure the distances and between the three circles are evenly spaced or you will end up with wonky baskets not stacking perfectly.

Round Nesting Baskets Tutorial
(allow 2+ hours to complete)
Below are the links to the three templates that you will need for the bottoms of the baskets. You will want to print all three pages off and tape them together so that they make a complete circle. The circle should line up perfectly with just some minor trimming of the boarder on the paper. Once taped together, start by cutting out the large circle. Then use the large circle to cut out your two pieces of fabric and one piece of batting. Then cut your template into a medium sized circle and cut out your two pieces of fabric and batting. Repeat with the small circle. That way you only have to print off one copy of each. 

Round nesting basket template 1

Round nesting basket template 3

Materials Needed:
*1 1/2 yards fabric (I used two different fabrics just because I didn’t have enough fabric for the inside and outside of baskets, but you can use just one fabric.)
*1 yard batting or stabilizer (I had to use insul-bright because that is all that I had on hand, but it worked great.)


**To make things easier for you, keep the pieces of fabric and batting cut out organized by basket sizes.**


Cut the following from the cotton fabric:

Large 11 1/2″ basket: 2 pieces 38″ x 6 1/2″ & 2 large round pieces by using template above.

Medium 9 1/2″ basket: 2 pieces 30″ x 6 1/2″ & 2 medium round pieces by using template above

Small 7″ basket: 2 pieces 23 1/2″ x 6 1/2″ & 2 small round piecse by using template above


Cut the following from batting or stabilizer:

Large 11 1/2″ basket: 1 piece 38″ x 6 1/2″ & 1 round piece by using template above

Medium 9 1/2″ basket: 1 piece 30″ x 6 1/2″ & 1 round piece by using template above<

Small 7″ basket: 1 piece 23 1/2″ x 6 1/2″ & 1 round piece using template above

We will start by making the large 11 1/2″ basket. Gather all of the pieces that you cut out for the large basket. Now take one round piece and one 38″ long piece of fabric, along with the round and 38″ long pieces of batting.

Place the 38″ long piece of fabric right side up on top of the batting. Now fold the two edges together so that the fabric is right sides facing. Pin in place on edge.

Sew edge and make sure you backstitch. Now place the round piece of fabric right side up on top of the round piece of batting. Place a few pins in the middle of the circle. These are just to keep the two pieces together while you pin them the onto the tube in the next step below.

Pin the circle piece with the tube you just made together, right sides facing. Take your time and use lots of pins. This will make it easier to sew. Sew edge.

Your basket should look like this now.

Now take the remaining two pieces of fabric. Remember I used two different fabrics to make each basket.

Make a tube with the 38″ piece of fabric by sewing the edge together.

Pin right sides together. Sew. Your piece will now look like this.

Turn right side out and carefully iron the edges of the circle. Pin the two baskets together by placing right sides together.

Sew, but make sure you leave a good 3″ opening for turning right side out.

Turn right side out.

Iron edges flat.

Top stitch around top edge two times.

Now repeat the same steps with the medium and small basket pieces.

**Please feel free to use this tutorial for your personal sewing projects…not to sell in your etsy shop. You may link this to your blog and use any photo’s. Just please be kind and give credit where credit is due. I put a lot of time into my designs and tutorials.**

Any questions or comments please do not hesitate to contact me. If you make one using this tutorial, please add it to my flickr group. I would love to see it!


See you in a few days with a tutorial so we can start filling your baskets!

Fat Quarter Friday (fabric i spy book tutorial)

I wasn’t going to post anything this week for Fat Quarter Friday but I found a tutorial for a fabric i spy book that I made about 6 months ago and never posted. At the time I had seen a few bloggers making their own i spy books by setting up a scene and then taking pictures of them. Those seemed a little too high tech for me, so I came up with these i spy books made of fabric and filled with some fun little items move around. The kiddo’s ended up loving them and they make a great little book to use in the car or the doctors office. Fabric i spy book {tutorial}

(allow 1-2 hours to complete)

Materials Needed:

*small-med sized fabric scraps or a few fat quarters (see cutting instructions below for exact sizes of scraps needed)

*iron-on interfacing or batting

*little i spy items (see my below)

*make a 7×5 & a 16×6 template out of card stock Cut out the follow pieces:

*Cut out three pieces of plastic 4″x4″, or to your desired size

*Cut four pieces of fabric 8″x 6″ (pages of book)

*Cut two pieces of fabric 17″ x 7″ (cover of book)

*Cut two pieces of interfacing or batting 8″ x 6″ (pages of book)

*Cut two pieces of interfacing 17″ x 7″ (cover of book)

**Switch to a Teflon foot.** It will make sewing on top of the plastic much easier. Now take one piece of the 8x 6 fabric and one piece of plastic. Sew the plastic in place on one side, then place a few of the i spy items under the plastic. Now sew the other three sides. Just take your time sewing the plastic on and move the items around if you need to. The fabric will stretch slightly whereas the plastic wont, so just take you time at this point. Add embellishments to the fabric if you want to. I didn’t on this piece, but wish i would have. Now take another 8×6 piece of fabric and iron on the interfacing. If you are going to use batting then just pin it onto the wrong sides of fabric. Now add some ric-rac or embellishments to the piece of fabric if you want. Now take the two pieces of fabric and place them right sides together. Make sure the piece of fabric with the interfacing is facing up. Take your 7×5 template and trace around it onto the interfacing. Sew directly onto the marks you just made from your template, but make sure you leave a 3″ opening for turning right side out. Trim those edges, except where the opening is. Turn right side out and iron flat. Be careful around the plastic, you don’t want to melt it. Top stitch around outer edges. This is what the back of the page looks like.

Repeat with the other two pieces of 8×6 fabric. This time I added more embellishments to the fabric pieces before sewing right sides together.

Now that you have your two inside pages it is time to make the cover of the book. Take the two 17×7 pieces of fabric. Iron on your interfacing to one of the pieces of fabric or pin your batting onto the wrong side of the fabric. Now embellish the pieces of fabric however you would like. Have fun with it. Once finished embellishing, place the two pieces of fabric right sides together, with the one with the interfacing or batting on top. Now trace the 16×6 template onto the interfacing. Sew on top of marks while leaving a 2″ opening for turning right side out. Trim excess fabric.

Turn right side out and iron flat. Top stitch around outer edges.

Back side looks like this.

Now lay the two pages inside of the cover like shown below.

Fold the cover over and make sure all of the pages are lined up on the inside and none of them are sticking out.

Sew in place on the left hand side. Make sure all of the pages were sewn in.


I wouldn’t suggest adding more then two pages to the book or you wont be able to sew the book shut. Just a little tip.


**Please feel free to use this tutorial for your personal sewing projects. You may link this to your blog and use any photo’s. Just please be kind and give credit where credit is due.**

Any questions or comments please do not hesitate to contact me. If you make one using this tutorial, please add it to my flickr group. I would love to see it!

How to make a kite from a garbage bag {Tutorial}

A little over a month ago I shared a tutorial over at U Create with kids on how to make a kite from a garbage bag. It is so quick and easy to make your own kite, all you need is a few materials and a windy day.

Garbage Bag Kit Tutorial
(allow 30 minutes to 1 hour to complete)
Materials Needed:
*2 skinny wooden dowels from the hardware store
*1 garbage bag
*duck tape
*ribbons and string Cut one of the dowels 21″ long and keep the other dowel full length for now. Take the 21″ dowel and center horizontally it onto the larger dowel 9″ down from the top of the longer dowel. My dowel ended up being 10 1/2″in from the sides when centered. Secure the dowels in place by wrapping string or ribbon around the dowels in the middle. Make sure that they make a straight cross and are as even as possible. Take and lay your garbage bag flat on the floor. Place your cross on top of the bag. You want the top of your cross to be even with the top of your bag. Mark your wooden dowel where you want to cut the excess part off. I wanted to cut the drawstring part off from my kite, so I measure just above where the drawstring area stopped and cut my dowel there. Cut the dowel with a pair of sharp kitchen scissors. Should look like this now.

Take some duck tape and tape it around all of the edges of the dowels. This will keep the dowels from making holes into your kite.
Now lay the cross onto the bag. Measure to make sure you have it evenly spaced on the sides and as close to the top of the bag as possible. Tape the dowel in place at the edges of each of the dowels.
Now take and fold the top edges of the garbage bag in. Try and keep them neatly folded and even. Place tape on the front.
And fold it over neatly, like so.
Repeat with the other side of the kite.
Your kite should look like this now.
Cut off the drawstring part if your bag has one.
Tape the bottom of the bag.

Tie some ribbons onto the bottom of the kite.

Tie a piece of string or ribbon onto the kite just above the center of the cross. Wait for a windy day and enjoy!


Fabric Curly-Cue Ribbon {Tutorial}

The other night I was packaging up some gifts and orders that needed to be shipped out. Usually when I package up my gifts and orders I place them into a drawstring bag that I have made. I first started doing that with my bibs and large orders and have decided to do this with my jewelry sales as well. (I guess sewing is still my love, since I spend more time sewing these little bags then making the pieces of jewelry.) Anyhow, I was working through my scrap pile when I decided to use long skinny strips of fleece as my ties. But when I cut the long strips of fleece and pulled on them to string them through the bag they immediately turned into these sweet little curly-cue ribbons. Oh yes, I was giddy as any crafty momma would be. This is kinda like that cheap plastic rolls of ribbon that you buy in the store and use your scissors to curl…but waay cuter! So you wanna make some too?

Just grab a piece of fleece. I used anti-pill fleece. I’m not sure if this works with regular fleece as well, sorry but I didn’t have any regular fleece to try it on. You don’t need a very wide piece of fleece since you will be cutting off a very skinny piece. And as far I could tell, once the fabric is pulled it at least doubles in length, if not more.
Now line up the fabric so that it stretches vertically when pulled on. When you pull on the fleece horizontally it should not stretch.
Now grab your rotary cutter and cut a tiny little strip. I cut mine about 1/8 of an inch by about 10″ or so.
Now hold the top of the strip and slowly pull on it starting from the top to the bottom. That is it, easy right? Now you have some cute fabric curly-cue ribbon to tie around those homemade packages. Unfortunately the curly-cues don’t last forever…I know, stinker! The more I played with the ribbon the more the curls started to get larger and eventually became wavy. But luckily you are left with a cute little fleece cord. Either way, I think it is a great way to use up fleece scraps and add a cute little curly-cue to your gifts.
This definitely adds a whole new way of wrapping gifts with curly-cues without using that cheap looking plastic ribbon.

Come visit me at Me Sew Crazy today!

I’m so excited to be over at one of my favorite blogs today…Me Sew Crazy! And I’m actually kinda surprised (and a little nervous) that Jessica is actually allowing me to sit one of her “babies!” Her sewing skills are AMAZING and she continues to impress me with every post. And in all honesty, if it wasn’t for Jessica and her amazing tutorials I never would have started sewing clothes. She inspired me to step out of my comfort level and try something new and this was one of those creations.
So head on over to Me Sew Crazy to see how make your own ruffled maxi skirt and while your there peruse through her amazing tutorials, because I promise you will be inspired too!

Nursing Cover/Swaddling Blanket Tutorial

Over the next few weeks I will be sharing a bunch of baby related tutorials with all of you and at the end I will be showing you how I put them all together to make the most precious baby gift for my sister in law. So first up is this great Nursing Cover/Swaddling Blanket Tutorial.

With the addition of each baby I realized that I actually needed and wanted less “stuff” to get by. After all, I had a newborn, a 16 month old and a 3 year old all in tow. The less stuff I had to carry, the better. So I never used a nursing cover plus I always wore Glamour Mom or Bravado nursing tanks, so those allowed me to nurse in public while being discrete. However there were many times I wish I had one, and ended up resorting to using a baby blanket (that I always had on hand) to cover up with. With baby #2 I purchased a few swaddling blankets from Amazon that I just loved. They were actually just soft cotton knit blankets with rounded edges. They made a great little cover up when needed and I loved how lightweight and breathable they were, plus the material was the best for swaddling or covering up that little baby of mine. The only problem I had while nursing with these blankets was that since my little one wasn’t used to being covered up while nursing, she kept pulling the blanket down, so let’s just say it was a struggle staying discrete at times.

So when my sister in law became preggers with baby #5 I knew I was just going to make her things that she needed and would use. After all, she is going to have 5 in tow now…so the less things to carry the better. So the first thing I thought up and made for her was this nursing cover/swaddling blanket. After making it, I so wish I would have thought of this before. It definitely would have saved me from a few embarrassing moments, oh well! These nursing covers/swaddling blankets are so easy to make and probably only took me about 1/2 hour start to finish.

Nursing Cover/Swaddling Blanket Tutorial

Materials Needed:

*Cotton knit fabric cut to the size of your choice.

*Suspender clips. I purchased mine here.

Cut the cotton knit fabric to the size of choice. Round the edges.

Now set your sewing machine on a small zig-zag stitch. Your going to make the edges into lettuce ruffled edges. If you have never done that before here is a great tutorial on it.

Of course you could add a knit binding all around the edges instead, but that would take a bit longer to make and really, I just love the little ruffles on the edges.

Cut one piece of cotton knit fabric to the desired length and width. This is going to be the removable strap that will go around your neck and attach to the blanket…turning it into a nursing cover.

No need to finish the raw edges, just fold up and sew in place.

Now you have the little clip when you need to turn your swaddling blanket into a nursing cover. Just make sure you remove the clips before giving the blanket to baby…safety first right?

Need a nursing cover…add the clips. Need a baby blanket…remove the clips.


**Please feel free to use this tutorial for your personal sewing projects. You may link this to your blog and use any photo’s. Just please be kind and give credit where credit is due.**

Any questions or comments please do not hesitate to contact me. If you make one using this tutorial, please add it to my flickr group. I would love to see it!

Fat Quarter Friday {Cooling Mat Tutorial}

This week I’m sharing a tutorial for something that I desperately needed. Most of you know by now that when I bake or preserve our veggies and fruits, I do so in large quantities. That means my kitchen usually becomes a huge mess and I end up using every pan and bowl in sight. The only problem that I usually run into is the lack of cooling racks and the size of the racks. I get so irritated because even though I have a bunch of cooling racks I still never have enough cooling space. I knew there had to be an easier way of cooling pans and that’s when my crafty mind came up with some cooling mats. The cooling mats are made the same way as hot mitts or hot pads, just increased in size to 24″ x 14″. Can I tell you how much I already love these mats!! Seriously! I made the mats big enough so that I could place two muffin pans or two pie pans side by side. The mats will also fit one large jelly roll pan, perfect for when we make pizza’s. These mats are also going to work great for canning. And for those of you that are lucky enough to eat at a dining room table how fabulous would these work for putting your hot dishes onto the table? I made one mat with bias tape and two without. I love the looks of the bias tape trimmed cooling mat, but love how much quicker the other two mats without bias trim came together. Of course you could really spice these mats up by quilting them before adding the bias tape. Ok, I think you all get the point…I love these mats!

Cooling Mat Tutorial
(allow 1-2 hours depending on which mat you make)

Materials Needed:

*2 large pieces of fabric (a little larger then a fat quarter) to your desired size for your mat.

I cut my pieces 25″ x 15″ to give me a 24″ x 14″ mat.

*Insul-Bright (same size as fabric pieces)

*Warm and Natural cotton batting (same size as fabric pieces)

*Bias tape about 85″ long (about 1-2 packages if store bought) I made my own bias tape.

Cut your two pieces of fabric, Insul-Bright and 2 pieces of cotton batting to your desired sized. I cut mine a little larger then a fat quarter 24″ x 14″.

Layer all of the pieces together like so: Fabric piece right side down, cotton batting, Insul-Bright, cotton batting and then the other piece of fabric on top, right side up.

Pin pieces together.

Trim any uneven edges.

Grab the bias tape and start pinning onto the fabric pieces, just until you get to the first corner.

If you are using homemade bias tape make sure you sew in a little from the middle of the crease in the bias tape. If you are using store bought tape, make sure you pin the smaller side onto the pieces of fabric first. This will keep you from seeing the stitches on the other side of mat.

When you get to the corners, take your time and square the corners off like shown here. This is a great tutorial if you are new to using bias tape.

This is what the front looks like when the bias tape is sewn onto the front.

Flip mat over and fold bias tape over and under. Start pinning bias tape in place again. The more the pins, the better! Top stitch bias tape and that is it! Super easy, right?!

Now, the next cooling mat is for those of you that do not want to take the time to sew with bias tape. Follow the first few steps above. Except this time you only have to cut the top piece of fabric to the size you want. You are going to use that top piece of fabric as your guide when sewing the pieces all together. Then once the pieces are sewn together you can trim the excess fabric off. I have found it much quicker to do it this way, less cutting and easier to do because you dont have to keep the edges lined up perfectly when sewing.

You will still need to cut two pieces of fabric, two pieces of cotton batting and one piece of Insul-Bright. I cut mine 25″ x 14″.

This time you are going to layer them a little different.

Layer the pieces like so: cotton batting on bottom, Insul-Bright, cotton batting, One piece of fabric right side up and then the last piece of fabric ontop right side down.

Pin all the pieces together.

Sew all the pieces together, leaving a 2″ opening for turning right side out. The pieces don’t have to line up perfectly at this point. Just make sure the cotton fabric piece on top is the size you want your mat to be. Another little trick I do is make the sew seam a little bigger on the side you have the opening on. That way when you go to tuck the opening in it is easier to sew shut when your top stitching.

Trim off excess fabric, but leave a little extra fabric at the opening. This makes it easier to fold the opening in when top stitching.

Turn right side out.

Iron flat and top stitch and the edges two times.

And that is it, your finished!


**Please feel free to use this tutorial for your personal sewing projects. You may link this to your blog and use any photo’s. Just please be kind and give credit where credit is due.**

Any questions or comments please do not hesitate to contact me. If you make one using this tutorial, please add it to my flickr group. I would love to see it and you just might see it featured on my blog someday!